Table of Contents
- What Is Included in an Indoor Golf Simulator Package?
- Who This Type of Package Is Best For
- The 5 Buying Factors That Matter Most
- How to Choose the Right Package for Your Space
- How to Choose the Right Package for Your Budget
- Common Package Mistakes to Avoid
- Package Examples by Use Case
- When a Package With a Projector and Screen Makes More Sense Than Buying Parts Separately
- FAQ
- Conclusion
Indoor Golf Simulator Guide
How to Choose an Indoor Golf Simulator Package With a Projector and Screen
An indoor golf simulator package with a projector and screen can create a far more immersive setup than a basic net-and-monitor station, but the right package depends on more than just the list of parts. Room dimensions, launch monitor fit, projector throw ratio, screen quality, and upgrade flexibility all shape whether the setup actually works.
If you are trying to figure out what kind of package makes sense for your home, this guide will help you choose the right direction based on your space, budget, and priorities. Instead of chasing a generic “best package,” the smarter move is to understand which component decisions should lead the build.
If you already know where your biggest decision sits, start by comparing
portable launch monitors,
short throw projectors,
and
golf simulator screens
first.
Quick takeaway
The best package is not a universal bundle. It is the setup that matches your room size, your launch monitor needs, your projector distance, and the screen quality you actually need for regular indoor play.
What Is Included in an Indoor Golf Simulator Package?
A true golf simulator package is not just a shopping list. It is a coordinated system built around compatibility. At a minimum, most packages connect a launch monitor, a hitting area, a projector, and an impact screen into one usable simulator environment.
Depending on price and intended use, a package may also include an enclosure, software access, side protection, turf, mounting hardware, or a computer that can actually run the simulator platform properly. The more complete the room setup becomes, the more important those compatibility details get.
Who This Type of Package Is Best For
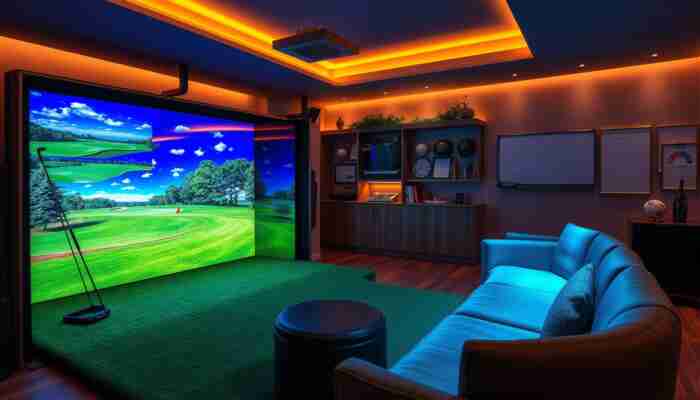
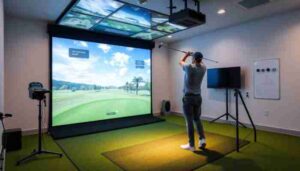
A projector-and-screen package makes the most sense for golfers who want something more immersive than a simple practice station. It is especially useful if you want simulated course play, a clearer visual target, and a setup that feels more like a finished simulator room than a temporary range corner.
It is a strong fit for garage builds, basement conversions, spare-room simulators, and home golfers who want a better overall playing environment without having to guess at every single component relationship on their own.
This type of package is a strong fit if…
- You want a more realistic visual simulator experience
- You are building in a garage, basement, or spare room
- You want more than a net-only practice setup
- You care about component compatibility
- You want a cleaner path to a complete home simulator
It may be the wrong direction if…
- You have not measured the room yet
- Your depth and ceiling clearance are too limited
- You only want simple data practice and no sim visuals
- You are trying to solve every need with one generic bundle
- You have not decided what type of launch monitor fits your room
The 5 Buying Factors That Matter Most
1. Room dimensions and ceiling height
The room should always lead the package decision. Width, depth, and ceiling height affect screen size, hitting distance, swing clearance, and projector placement. They also influence whether the package should be built around a more compact setup or around a larger immersive room layout.
If the simulator will be used by both left- and right-handed golfers, centered play and shared-use planning become even more important. That can change which monitor style works best and how wide the screen area should be.
2. Launch monitor type
The launch monitor is the foundation of the entire simulator experience. It affects accuracy, software compatibility, space requirements, and how easy the system is to use day to day. That is why it often makes more sense to start by choosing the monitor class first, then match the projector and screen around it.
If you are still comparing options, review
portable launch monitors
to see which type of setup makes the most sense for your room and budget.
3. Projector fit and throw ratio
One of the strongest real demand clusters around this topic is the projector question, especially short throw fit. That makes sense, because a projector that does not match the room is one of the fastest ways to ruin an otherwise promising package.
In many home builds, a short throw model is the smarter direction because it can create a larger image from a shorter mounting distance. Brightness matters too, especially if the room is not fully light controlled.
If projector placement is still unclear, compare
short throw projectors for golf simulators
before locking in a package.
4. Screen and enclosure quality
Another major search-demand cluster here is the screen itself. That is a strong signal that golfers do not see the screen as a throwaway accessory. They understand that image quality, durability, bounce-back control, and overall simulator feel depend heavily on the screen.
The enclosure matters too, because screen tension, protection, and room finish all influence how usable and safe the package really is.
If your biggest uncertainty is still the hitting surface and display area, start with
golf simulator screens
and then match the package around the right screen size and material.
5. Budget and upgrade flexibility
The best package is not always the most expensive. A well-balanced setup usually beats a mismatched one. In entry-level builds, the goal should be functional compatibility with a clean upgrade path. In mid-range and premium builds, more of the value comes from better integration, cleaner installation, and better overall room performance.
| Buying Factor | Why It Matters | Common Mistake | Best Next Step |
|---|---|---|---|
| Room size | Determines fit, safety, and realistic simulator planning | Buying before measuring | Measure width, depth, and height first |
| Launch monitor | Controls data, software, and room logic | Choosing the package before the monitor type | Choose monitor class first |
| Projector | Shapes image fill and visual usability | Ignoring throw ratio | Match image size to room depth |
| Screen | Affects durability, bounce-back, and image quality | Treating any screen as equal | Prioritize impact-screen quality |
| Budget | Shapes balance, finish level, and upgrades | Overspending on one part and compromising the rest | Build for balance before prestige |
How to Choose the Right Package for Your Space
The simplest way to think about it
Choose the room first, then the launch monitor, then the projector, then the screen. That sequence reduces mismatch and improves the odds that the package will actually perform the way you expect.
Small room or limited depth
In tighter rooms, fit should dominate the package decision. A right-sized screen, an indoor-friendly monitor, and the correct projector throw characteristics matter more than chasing the biggest possible image or the most complicated build.
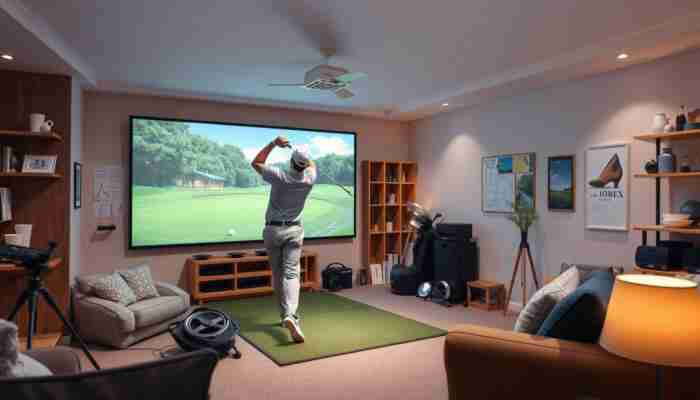
Standard garage setup
Garage builds often offer decent depth, but they also create lighting, mounting, and finish challenges. In this case, package quality often comes from screen durability, projector brightness, and a system that can handle a more practical space without becoming annoying to use.
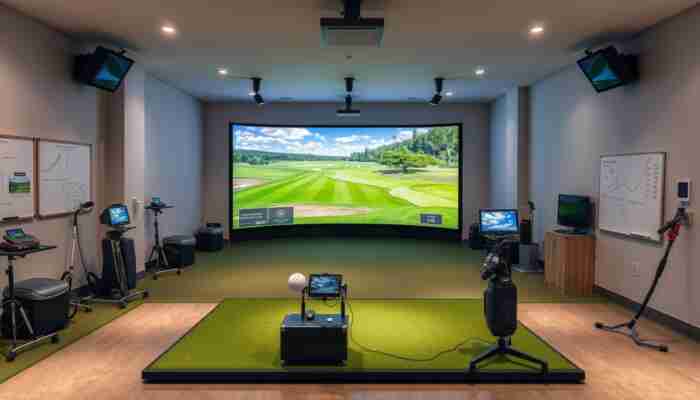
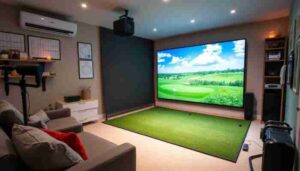
Dedicated simulator room
If you have a dedicated room, the package can lean more heavily into immersion, cleaner enclosure integration, and a more polished visual finish. This is where better screen quality and more precise projector matching can pay off the most.
Shared lefty-righty use
Shared-use setups should be planned around hitting position and room symmetry early. The wrong package can feel fine for one player and clumsy for everyone else.
| Room Scenario | Best Package Direction | Projector Direction | Screen Direction | Monitor Direction |
|---|---|---|---|---|
| Small room | Compact, fit-first package | Short throw usually matters more | Do not oversize the screen | Choose for indoor compatibility |
| Garage | Balanced and durable setup | Brightness and fit both matter | Durability is critical | Portable or permanent based on use |
| Dedicated sim room | Immersion-first package | Precise image matching | Premium screen and enclosure | Higher-end long-term option |
| Shared-use room | Centered-use planning | Mounting alignment matters more | Wider centered play zone | Choose for lefty-righty practicality |
How to Choose the Right Package for Your Budget
Entry-level package
The goal at this level should be a functional and compatible setup, not the illusion of a premium room. A balanced package with a sensible monitor, a workable projector fit, and a durable screen is usually better than stretching too hard for one expensive component while compromising the rest.
Mid-range package
Mid-range builds often provide the strongest value. This is usually where projector quality, screen performance, and a more capable monitor start to combine into a much better overall simulator experience.
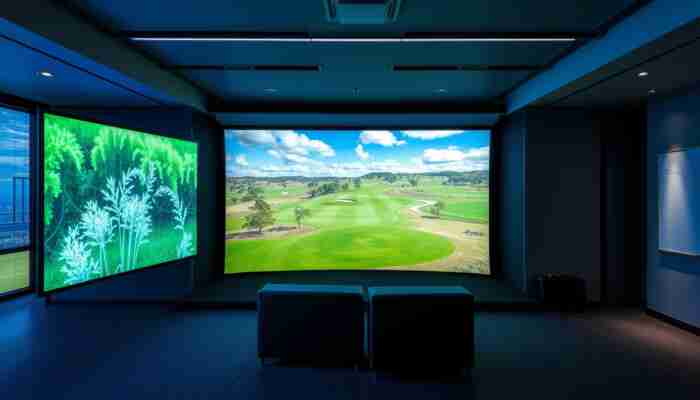
Premium package
Premium packages are more about optimization than excess. The room feels cleaner, the image fills correctly, the enclosure works better, and the simulator behaves more like a dedicated system rather than a bundle of parts that happened to fit together.
| Budget Tier | What You Usually Get | Main Limitation | Best For |
|---|---|---|---|
| Entry-level | Basic but playable simulator room | More compromise in finish and flexibility | First-time home golfers |
| Mid-range | Better balance, better image, better feel | Still depends on room planning | Most serious home builds |
| Premium | More polished, immersive room setup | Higher cost of optimization | Dedicated simulator rooms |
Common Package Mistakes to Avoid
Package Examples by Use Case
Example: A smaller garage setup
Best for golfers who want a practical, immersive home simulator without overbuilding the room.
Best direction: compact room fit, short throw logic, right-sized impact screen, indoor-friendly monitor.
Example: A balanced home simulator package
Best for golfers who want strong value and a better overall simulator experience without going fully premium.
Best direction: balanced monitor choice, cleaner projector fit, stronger screen quality, smoother upgrade path.
Example: A dedicated sim-room package
Best for long-term builds where image quality, finish, and room integration matter more.
Best direction: premium enclosure and screen, precise projector matching, and a more permanent monitor choice.
When a Package With a Projector and Screen Makes More Sense Than Buying Parts Separately
Buying piece by piece can work, especially for experienced builders, but packages usually make more sense when you want a cleaner path to compatibility. They reduce the risk of projector mismatch, wrong screen size, or monitor choices that do not actually fit the room the way you thought they would.
In other words, a good package is not valuable because it includes more parts. It is valuable because it removes friction between the parts that matter most.
The smartest next move depends on what still feels unclear
If the room is already measured, but the visual side still feels uncertain, compare
short throw projectors
and
simulator screens.
If the foundation of the setup still feels unclear, start with
portable launch monitors.
FAQ
Do I need a short throw projector for every golf simulator package?
Not always, but it is one of the most common real decision points in home simulator planning. Many indoor builds benefit from a short throw projector because it can create a large image from a shorter distance, which makes it easier to fit the setup into a garage, basement, or smaller room.
Is a golf simulator screen the same thing as a regular projector screen?
No. A golf simulator screen is an impact screen built to handle repeated golf ball strikes while still displaying a usable image. A normal projector screen is not designed for that type of impact and usually will not perform well in a simulator environment.
Can a portable launch monitor be the foundation of a full simulator package?
Yes. For many home golfers, a portable launch monitor is the most practical starting point. It often lowers entry cost, simplifies setup, and gives you a clear base around which to choose the projector, screen, and the rest of the package.
What should I choose first: the launch monitor, the projector, or the screen?
In most cases, start with the room and the launch monitor. After that, choose the projector based on throw fit, and then choose the screen size and material that match both the room and the image.
Is it better to buy a package or build a simulator piece by piece?
A package usually makes more sense if you want compatibility and a simpler planning process. Building piece by piece can work, but it usually requires more technical confidence and carries a higher risk of mismatch between the monitor, projector, screen, and room dimensions.
What is the most common mistake when choosing an indoor golf simulator package?
The most common mistake is treating the package like a generic product bundle instead of a room-based system. The right setup depends on space, monitor fit, projector distance, and screen quality working together.
Conclusion
The right indoor golf simulator package with a projector and screen is the one that matches your room, your simulator goals, and the kind of build you actually want to live with long term. Instead of looking for one “best” package, it is usually smarter to choose the right system direction.
Start with the launch monitor if the foundation still feels unclear. Start with the projector if room depth is the biggest concern. Start with the screen if image quality and impact performance are what matter most. That is the cleaner path to a simulator package that works well instead of just sounding good on paper.
Megan Thompson is an accomplished author and expert on indoor golf simulators, dedicated to helping golf enthusiasts enhance their game at home. With a passion for technology and sports, she explores the latest advancements in simulation equipment and offers insightful tips for players of all skill levels. Her engaging writing not only demystifies the complexities of indoor golf but also highlights its benefits for training and recreation, making her a trusted voice in the industry.

Discussion
23 Responses
It’s fascinating to see how indoor golf simulators are changing the landscape for golf enthusiasts. As someone who has dabbled in golfing for years, I’ve often found that weather can be a huge barrier to practice. The idea of having a full setup at home sounds incredibly appealing, especially for honing skills during the off-season or those rainy days.
It’s fascinating how indoor golf simulators have transformed the way we experience the game! I love the idea of being able to practice and enjoy various courses, regardless of the season. It reminds me of how technology has changed sports in general; just think about the way VR and simulation tech are reshaping training across multiple disciplines—like how professional teams analyze performance and strategize using data.
This guide does an excellent job of highlighting the intricate factors that go into selecting an indoor golf simulator package. I’ve found that, beyond just the technical specs, the emotional aspect of the setup can heavily influence the experience. For instance, I recently helped a friend set up a simulator in his garage, and we spent a lot of time considering the layout, lighting, and even the color scheme of the room. It became much more than just a place to practice; it became a fun, inviting space where friends could gather and play together.
This guide really sheds light on the complexities of setting up an indoor golf simulator! I’ve been contemplating a setup for my garage, and it’s clear that there are so many factors to consider beyond just picking the equipment.
This guide is incredibly useful for anyone looking to dive into the world of indoor golf simulators. It made me reflect on how much technology has transformed our approach to training and recreational activities, especially in niche sports like golf. I remember my first time trying an indoor setup; it was surprising how much room dimensions and the right equipment can enhance or hinder the experience.
This guide truly underscores the importance of considering multiple factors when selecting an indoor golf simulator package. I’ve recently been looking into setting up my own simulator at home, and it’s eye-opening to realize how room dimensions and projector throw ratios can completely change the experience.
This guide provides such practical insights into selecting an indoor golf simulator package. It’s clear that so many factors come into play beyond just the equipment itself, particularly when it comes to personal space and setup. I’ve spent hours researching the perfect configuration for my home, and I’ve realized that measuring the room dimensions and considering the throw ratio are crucial steps that many overlook.
I appreciate how you broke down the considerations for choosing an indoor golf simulator. The attention to room dimensions and projector throw ratio really resonated with me, especially since I’ve been contemplating a setup for my basement. It’s interesting how much these factors can influence not just the visual experience, but also the overall interaction with the game.
It’s great to hear that the breakdown resonated with you. Room dimensions and projector throw ratio are often the unsung heroes of creating a solid indoor golf experience. I know it can be tempting to jump in and start buying all the gear, but taking those measurements seriously can really set the stage for how much you enjoy playing.
I really appreciate the way you’ve broken down the complexities involved in selecting an indoor golf simulator package. It’s so easy to get lost in the specs and forget about how the setup will actually fit into your space. I remember when I was looking to set one up in my own garage; I didn’t initially consider the projector throw ratio and ended up with a setup that felt cramped.
This is a fantastic breakdown of the considerations when choosing an indoor golf simulator package. I’ve spent a bit of time researching different setups for my own home, and I can definitely relate to the complexities involved in finding the right fit. Room dimensions and projector throw ratio were two aspects I initially overlooked until I realized how critical they are for maximizing both space and performance.
Navigating the world of indoor golf simulators can be quite the journey, especially with all the different packages and options available. I appreciate how you’ve highlighted the importance of factors like room dimensions and projector throw ratios—these can easily be overlooked but are crucial for creating a fully immersive golfing experience.
Navigating the world of indoor golf simulators can feel overwhelming, especially for those getting started or looking to upgrade their setup. You raise a solid point about the importance of room dimensions and projector throw ratios; these technical specifications might seem like minor details at first glance, but they play a crucial role in how enjoyable the experience turns out to be.
Your insights on how to choose the right indoor golf simulator package resonate with me, especially the emphasis on room dimensions and projector throw ratios. It’s fascinating how technology can bridge the gap between indoor practice and the real course, but it also reminds us of the nuances that come with such setups.
It’s fascinating to see how technology has transformed the way we experience sports like golf. The idea of an indoor golf simulator, especially with the immersive capabilities of a projector and screen, really opens up possibilities for both practice and leisure. I remember when I first used a simulator; it felt like stepping onto the course from the comfort of my home, allowing me to focus on my swing without the weather conditions influencing my game.
You’ve touched on an interesting aspect of indoor golf simulators that often gets overlooked—the psychological impact of a controlled environment. It’s true that the absence of external factors like weather can create a space where players can hone their skills without distraction. But I wonder if this kind of practice, while beneficial, risks detaching players from the reality of an actual course.
This guide captures the essence of transforming a space into a haven for golf enthusiasts. The balance between technology and environment really struck a chord with me—it’s fascinating how the right setup can elevate not just your game, but also your overall enjoyment of the sport.
I appreciate the thoroughness of your guide on choosing an indoor golf simulator package, particularly the emphasis on the various factors that contribute to a successful setup. It’s quite enlightening to see how something that seems straightforward, like adding a projector and screen, can actually involve so many nuanced considerations.
This guide hits on some really key points that often get overlooked when folks are excited about diving into indoor golf simulators. I remember when I was setting up my own space, I was so caught up in the bells and whistles of the tech that I forgot to fully think through the room dimensions. It was a bit of a scramble to make everything fit just right after I realized the projector throw and screen size weren’t in sync!
It’s fascinating to see how indoor golf simulators have evolved, providing players with such immersive experiences right in the comfort of their homes. The consideration of elements like room dimensions and projector throw ratios really underscores how nuanced this decision can be. I remember when I first decided to set up a small golfing area in my garage; I was initially drawn to the idea of just getting a net and a monitor, but after some research, I realized how much more enriching a full projector and screen setup could be.
I appreciate how you’ve outlined the multifaceted considerations when selecting an indoor golf simulator package. It’s fascinating to think about how our home environments shape our experiences, especially with something as nuanced as golf simulation.
This guide is really insightful! I was surprised by how much room dimensions and projector throw ratios play into the overall experience—these details can make or break your indoor golfing setup. It reminds me of my friend’s home simulator, which he set up in a smaller room without considering how the projector would fit. The resulting shadows really impacted his game play.
Your breakdown of the considerations for selecting an indoor golf simulator package is not only practical but also highlights the complexities involved in creating a setup that truly enhances the golf experience at home. It resonates with many amateur golfers like myself who often feel overwhelmed by the plethora of options available. I’ve found that thinking through the specifics—like room dimensions and projector throw ratios—is crucial. It’s easy to get caught up in the excitement of the technology and forget how physical space can dramatically impact the overall performance and enjoyment of the simulator.