

Table of Contents
- How Does a Home Golf Simulator Work?
- What Should You Check Before Setting Up the Simulator?
- Basic Home Golf Simulator Setup Sequence
- Your First Simulator Session: Test the System Before Training
- How to Structure a Useful Golf Simulator Practice Session
- What Simulator Feedback Can — and Cannot — Tell You
- Basic Golf Simulator Troubleshooting
- Routine Care for a Home Golf Simulator
- When to Stop Troubleshooting and Contact Support
- Keep Buying, Cost and Setup Planning Separate
- Frequently Asked Questions
- Bottom Line
Home Golf Simulator Practice Guide
How to Use a Home Golf Simulator: Setup, Practice & Troubleshooting
A home golf simulator is most useful when the room, tracking system, software and practice process work together. The launch monitor or other tracking hardware captures information about the shot, the software turns that information into data and virtual ball flight, and the hitting area lets you repeat shots indoors under controlled conditions.
Using the system well is not simply a matter of turning it on and hitting balls. You need to confirm the equipment is positioned correctly, follow the manufacturer’s setup or calibration instructions, choose a clear practice goal and interpret only the feedback your specific system actually provides.
This guide covers that practical workflow from first setup through everyday practice, basic troubleshooting and routine care.
Last reviewed: November 5, 2026. Setup, calibration, software and maintenance procedures vary by manufacturer and model. Always use the current documentation for your exact launch monitor and simulator software.
Quick answer
To use a home golf simulator effectively, first verify that the room and hitting area satisfy the requirements of your equipment. Position the launch monitor exactly as instructed, connect the required computer or mobile device, complete any required alignment or calibration, and confirm that test shots are detected correctly. For practice, work on one defined task at a time and compare a small group of similar shots rather than reacting to every individual swing.
How Does a Home Golf Simulator Work?
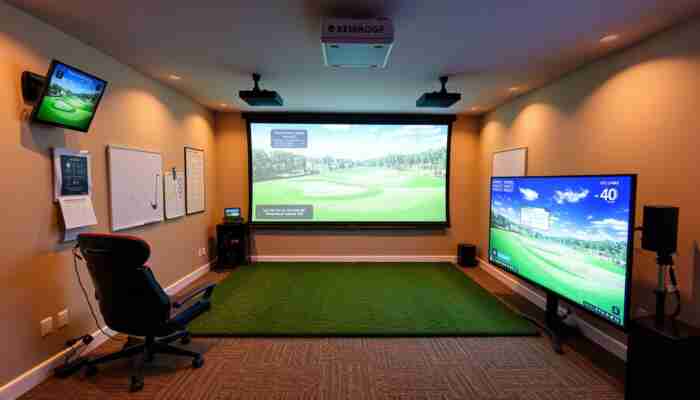
A home golf simulator combines shot tracking with software and a safe indoor hitting area.
The basic system usually contains four functional layers:
| Layer | What it does | What varies by system |
|---|---|---|
| Tracking system | Observes the golf ball and, on some systems, the club | Technology, placement and available metrics |
| Hitting area | Provides a repeatable hitting position and safely contains the ball | Mat, net, screen, enclosure and required clearances |
| Software | Displays shot information, practice tools or simulated golf | Metrics, courses, drills, subscriptions and compatibility |
| Display device | Shows the practice interface or virtual course | Projector, monitor, television, tablet or integrated screen |
Not every home simulator needs a projector, dedicated gaming PC or full enclosure. A practice setup can consist of a launch monitor, hitting mat, net and compatible device. A projected simulator adds an impact screen, projector and usually more room protection.
For the detailed component-planning task, use our
home golf simulator component checklist.
What Should You Check Before Setting Up the Simulator?
Room fit should be verified against the golfer and the exact equipment rather than one universal room-size recommendation.
Before installation, confirm:
- Swing clearance: the intended golfers can make a full swing with the clubs they plan to use.
- Tracking position: the launch monitor can sit or mount where the manufacturer requires.
- Ball containment: the net, impact screen and surrounding protection can safely contain expected shots.
- Power: outlets are available for the devices that need them.
- Device compatibility: the computer, tablet or phone supports the selected launch monitor and software.
- Network: internet or local-network access is available if the software requires it.
- Display path: the computer or compatible device can send the intended image to the projector, television or monitor.
If the project is still at the buying stage rather than the setup stage, compare
complete golf simulator systems
before configuring the room.
Basic Home Golf Simulator Setup Sequence
The safest setup sequence is to follow the dependency order of the system and use the manufacturer’s instructions at every hardware-specific step.
- Prepare the hitting area. Clear the swing zone and install the required mat, net, screen or enclosure.
- Mark the hitting position. Establish where the golf ball will sit relative to the screen and tracking device.
- Position or install the launch monitor. Follow the required distance, orientation and mounting instructions.
- Connect the required device. This may be a computer, tablet, phone or integrated system depending on the hardware.
- Install or open the required software. Confirm that the correct launch monitor is recognized.
- Complete alignment or calibration if required. Use the process documented for that model rather than a generic routine.
- Configure the display. Set the intended monitor, television or projector output.
- Run several test shots. Confirm that shots are detected consistently before starting a structured practice session.
Some systems require formal calibration while others rely mainly on correct placement or alignment. Do not assume a procedure used for one launch monitor applies to another.
Your First Simulator Session: Test the System Before Training
The first session should establish that the equipment is working consistently, not attempt to rebuild your golf swing.
Use one familiar club and hit a small group of ordinary shots. Check:
- whether every normal shot is detected;
- whether the ball starts in a direction that broadly matches what you saw at impact;
- whether the available data updates consistently;
- whether the hitting position remains inside the required tracking zone;
- whether the mat or hitting surface moves;
- whether the projected image or separate display remains stable;
- whether cables, mounts or equipment enter the golfer’s swing area.
If the system passes those basic checks, save the session if your software provides session history. A known working baseline makes later troubleshooting much easier.
How to Structure a Useful Golf Simulator Practice Session
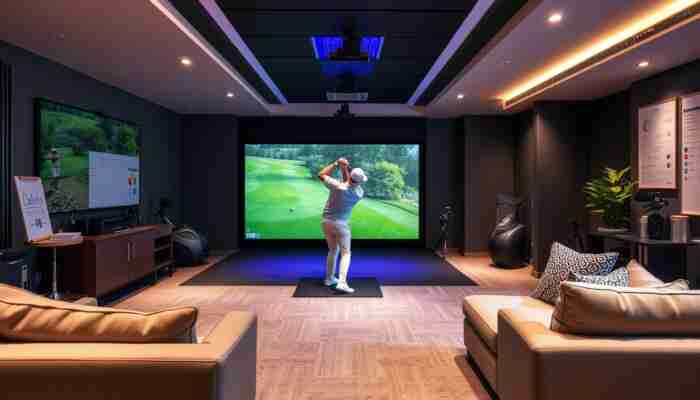
Simulator practice becomes easier to interpret when each session has one clear task.
Step 1: Choose One Goal
A session can focus on one task such as:
- starting direction;
- distance control with one wedge;
- driver dispersion;
- consistent contact;
- shot shape;
- club gapping.
Use a task your simulator can actually measure or help you observe.
Step 2: Record a Baseline
Hit several normal shots without deliberately changing technique. A small group of comparable shots provides more useful context than one unusually good or bad swing.
Step 3: Select Only the Relevant Feedback
If the goal is dispersion, concentrate on direction and grouping rather than every number on the screen. If the goal is distance control, compare carry or another relevant distance metric provided by the device.
More data does not automatically make the practice task clearer.
Step 4: Make One Deliberate Change
Change one setup variable, intention or technical cue at a time. If several things change simultaneously, it becomes much harder to connect the new shot pattern with a specific adjustment.
Step 5: Compare Another Group
Compare patterns rather than judging the session by the best shot. If your software stores sessions, notes or shot groups, use those tools to preserve the comparison.
Step 6: End With a Simple Summary
Record what you tested, what changed in the simulator feedback and what you want to check next time. This keeps the next session connected to an actual observation rather than starting from a new random swing thought.
What Simulator Feedback Can — and Cannot — Tell You
Simulator feedback can describe the shot and, depending on the hardware, some aspects of club delivery. The exact data available varies by system.
Your device may provide information such as:
- ball speed;
- launch direction;
- launch angle;
- spin;
- carry distance;
- club speed;
- club path;
- face or strike information.
Do not assume every displayed metric is measured directly. Some systems measure certain parameters and derive or calculate others. Some metrics may require marked balls, club stickers, additional hardware or a specific software tier.
The simulator also cannot automatically identify one unique swing fault from the ball result. Similar shot patterns can be produced by different combinations of club delivery, strike and player movement.
For the separate measurement-reliability task, see our
golf simulator accuracy guide.
Basic Golf Simulator Troubleshooting
When a simulator stops behaving normally, begin with the simplest configuration checks before changing calibration or reinstalling software.
| Symptom | First checks | Next step |
|---|---|---|
| Shots are not detected | Ball position, tracking zone, device orientation, required markings | Check manufacturer setup documentation |
| Data suddenly looks different | Device movement, alignment, ball type, environment or configuration changes | Repeat manufacturer alignment/calibration procedure if required |
| Launch monitor will not connect | Power, cable/network connection, correct software, device permissions | Follow vendor connection troubleshooting |
| Software is unstable | Supported software version, operating system, updates and hardware requirements | Use software vendor support if the problem persists |
| Projected image does not fit | Output resolution, projector aspect ratio, image settings and mounting geometry | Recheck projector setup rather than changing launch-monitor settings |
| Right/left-handed switching causes problems | Device location and defined hitting zone | Use the model’s documented handedness workflow |
Do Not Recalibrate Automatically
Recalibration is not a universal solution. If the manufacturer does not instruct you to recalibrate for the symptom you are seeing, first verify placement, connections, software configuration and required accessories.
Routine Care for a Home Golf Simulator
Routine care should protect the tracking hardware, hitting area, screen or net and computer equipment without introducing cleaning methods that the manufacturer does not approve.
A practical routine includes:
- keeping optical surfaces and sensors free from obvious dust or obstruction using the approved cleaning method;
- checking that mounts and hardware have not shifted;
- inspecting the hitting mat for movement or damage;
- checking the impact screen, net and protective surfaces for visible wear;
- checking cables and connectors for damage;
- installing software or firmware updates according to vendor instructions;
- keeping ventilation openings on computers, projectors and electronics clear.
Do not use a generic schedule such as “recalibrate every month” unless the equipment manufacturer specifically recommends it.
When to Stop Troubleshooting and Contact Support
Manufacturer support is the better next step when the basic documented checks do not restore normal operation.
Contact the appropriate hardware or software provider if:
- the launch monitor repeatedly misses normal shots despite correct placement;
- calibration or alignment cannot be completed;
- the hardware reports a persistent fault;
- a firmware or software update fails;
- a required connection is not recognized after following the documented procedure;
- the equipment has visible physical damage.
Before contacting support, record the model, software version, error message and the steps already attempted. This usually makes the support conversation more specific.
Keep Buying, Cost and Setup Planning Separate
This guide assumes you already have a simulator or are close to completing the setup.
For related tasks:
Component Checklist
Work out what hardware your configuration actually requires.
Setup Cost Guide
Build the complete home simulator budget.
Simulator Accuracy
Understand measurement reliability and what affects it.
Golf Simulators
Compare systems if you are still deciding what to buy.
Frequently Asked Questions
What does a home golf simulator actually do?
A home golf simulator combines shot-tracking hardware with software and an indoor hitting area. The tracking system observes the shot, the software displays available measurements and virtual ball flight, and the hitting area lets you practice safely indoors.
How much room do I need for a golf simulator?
There is no universal room size. You need enough clearance for the golfer’s full swing plus the space required by the launch monitor, hitting area, net or screen and any projector or enclosure. Check the installation requirements for your exact equipment.
Do I need to calibrate my golf simulator every time I use it?
Not necessarily. Calibration and alignment procedures vary by system. Follow the manufacturer’s instructions rather than recalibrating automatically before every session.
How should I practice on a golf simulator?
Choose one defined task, record a small baseline group, use only the feedback relevant to that task, make one deliberate change and compare another group of similar shots. Avoid judging the session from one swing.
Can simulator data tell me exactly what is wrong with my swing?
No. The simulator can provide shot and, depending on the system, club-delivery information. It does not automatically prove that one specific body movement or swing fault caused the result.
Why is my simulator not detecting shots?
First check the ball position, tracking zone, launch-monitor orientation, required ball or club markings, connections and software configuration. If the setup matches the manual and the problem continues, use the manufacturer’s troubleshooting procedure.
How accurate is a home golf simulator?
Accuracy depends on the specific launch monitor, the metric being considered and whether the equipment is installed and operated under the required conditions. Do not treat all simulator systems or all displayed metrics as equally measured or equally reliable.
How should I maintain a golf simulator?
Keep the tracking hardware, hitting area, screen or net, cables and computing equipment in the condition specified by their manufacturers. Inspect for movement or visible wear, keep approved sensor surfaces clean and apply software or firmware updates according to vendor instructions.
Bottom Line
A home golf simulator works best when you treat it as both a measurement system and a practice environment.
Set it up according to the exact hardware requirements, verify that normal shots are detected consistently and then give each practice session one clear purpose. Use the feedback your device actually provides, compare patterns rather than isolated shots and avoid treating simulator numbers as automatic proof of a swing diagnosis or guaranteed real-course improvement.
When the system behaves differently from normal, troubleshoot placement, connections and software before changing calibration. For anything beyond those basic checks, the manufacturer’s documentation and support should remain the final authority.

Abigail Turner is a passionate writer and golf enthusiast specializing in indoor golf simulators. With a keen eye for detail and a deep understanding of the technology behind these platforms, she provides insightful content that helps players maximize their indoor golfing experience. Abigail’s engaging articles cover everything from equipment reviews to tips for improving one’s game, making her a go-to resource for both beginners and seasoned players alike.

Discussion
One Response
Ah, the magic of indoor golf simulators! It’s like having a personal golf course in your living room, minus the need for sunscreen or worrying about a rogue squirrel stealing your ball. I mean, who wouldn’t want to perfect their swing while wearing fuzzy slippers and sipping a cup of coffee?