
Table of Contents
- Is a Garage a Good Place for a Golf Simulator?
- Step 1: Measure the Garage Before Buying Anything
- Step 2: Decide Whether the Garage Will Be Dedicated or Multi-Use
- Fixed vs Retractable Garage Golf Simulator
- Step 3: Choose the Launch Monitor Around the Garage
- Step 4: Plan the Impact Screen and Ball Containment
- Step 5: Choose a Garage-Friendly Projector Layout
- Step 6: Control Garage Lighting
- Step 7: Fix the Concrete-Floor Problem
- Step 8: Plan for Heat, Cold and Humidity
- Step 9: Protect the Garage Door, Walls and Ceiling
- Step 10: Plan Power, Network and Cable Routing
- Garage Golf Simulator Equipment Checklist
- Three Practical Garage Simulator Builds
- How Much Does a Garage Golf Simulator Cost?
- Common Garage Golf Simulator Mistakes
- Garage Golf Simulator Build Order
- Start With How the Garage Needs to Function
- Frequently Asked Questions
- Bottom Line
Garage Golf Simulator Guide
Garage Golf Simulator Setup: Space, Equipment & Build Guide
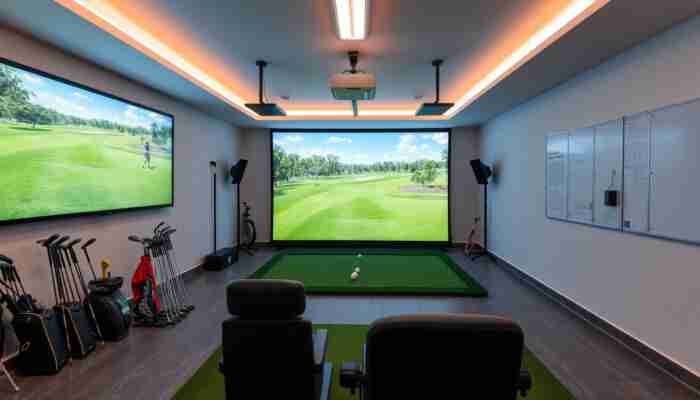
A garage can be one of the best places to build a home golf simulator because it provides separation from the main living area and can often accommodate a full hitting bay. But garage builds also create problems that normal indoor rooms do not: garage-door tracks, openers, concrete floors, changing temperatures, storage, ambient light and the need to keep the space usable for other purposes.
The right garage golf simulator therefore starts with the room — not the launch monitor. Measure the actual swing area, identify every obstruction, decide whether the simulator will be permanent or retractable, and only then choose the screen, enclosure, launch monitor, projector and hitting surface.
If you are still comparing complete systems rather than planning the garage itself, start with our
golf simulator systems.
Last reviewed: September 18, 2026. Room requirements vary by golfer, enclosure, launch monitor and projector. Always verify the dimensions and installation requirements of the specific equipment before ordering.
Quick answer
A garage golf simulator works best when you first confirm swing clearance, usable width and depth, garage-door hardware, screen placement, launch-monitor requirements and whether the garage must still serve another purpose. A dedicated garage can use a fixed enclosure. A working garage often benefits from a retractable impact screen, retractable enclosure or practice net that can disappear when the simulator is not being used.
Is a Garage a Good Place for a Golf Simulator?
Yes — if the usable space is large enough for your swing and the equipment you plan to install.
Garages have several practical advantages:
- they are separated from many living areas, reducing disruption from repeated ball strikes;
- the floor can usually support mats, turf and simulator structures without major remodeling;
- many garages provide more depth than spare bedrooms;
- the space can support permanent or retractable simulator configurations;
- electrical, lighting and storage changes can often be made without redesigning a finished living room.
The disadvantages are equally important. Garage-door tracks, springs and openers can occupy exactly the ceiling space needed for a driver swing. Concrete can be uncomfortable underfoot. Uninsulated garages can become extremely hot or cold. Daylight through an open door or windows can reduce projector contrast.
For these reasons, the question is not simply “Will a golf simulator fit in my garage?” The better question is “Where inside my garage can I swing safely while satisfying the requirements of the simulator equipment?”
Step 1: Measure the Garage Before Buying Anything
Do not measure only wall-to-wall dimensions. Measure the space that remains usable after accounting for garage hardware, cabinets, shelves, vehicles, workbenches and the golfer’s actual swing.
Ceiling Height
Ceiling height must accommodate the tallest golfer using the room with the longest club they expect to swing.
The critical measurement is not necessarily the garage’s advertised ceiling height. Check the exact hitting position for:
- garage-door tracks;
- door opener and motor;
- support brackets;
- lighting fixtures;
- ceiling-mounted storage;
- ducts, pipes or beams.
Take slow practice swings with the club you actually intend to use. Do not rely solely on a tape-measure estimate.
Width
Width affects both swing clearance and where the ball can be positioned relative to the screen.
A centered hitting position is useful when both right- and left-handed golfers will use the simulator. A right-handed-only or left-handed-only setup may allow the hitting point to shift toward one side, depending on the room and equipment.
Remember that the enclosure itself also occupies width. Padding, side curtains and frame tubes reduce the clear space available to the golfer.
Depth
Garage depth must support several separate distances:
- space behind the golfer;
- golfer-to-screen distance;
- space behind the impact screen;
- projector position;
- launch-monitor requirements.
Those requirements differ between launch monitors. A device that works from above the hitting area creates a different room layout from a radar unit positioned behind the ball.
Step 2: Decide Whether the Garage Will Be Dedicated or Multi-Use
This decision changes almost every other part of the build.
| Garage type | Best setup direction | Main priority |
|---|---|---|
| Dedicated simulator garage | Fixed enclosure, permanent mat/turf and permanently aligned projector | Performance and finished-room experience |
| Garage still used for parking | Retractable screen/enclosure and movable or protected hitting area | Fast conversion and floor-space recovery |
| Garage + gym/workshop | Retractable or compact enclosure with clearly separated swing zone | Safety and flexible room use |
| Practice-only garage | Net + mat + launch monitor | Simple setup without projector or full enclosure |
Fixed vs Retractable Garage Golf Simulator
Fixed Enclosure
A fixed enclosure makes sense when the garage will remain a golf room most of the time.
Its main advantages are repeatable alignment, permanent side protection, easier cable management and less setup before each session. Browse
golf simulator enclosure packages
for the permanent-build route.
Retractable Screen or Enclosure
A retractable setup is usually more useful when a car, gym equipment, tools or storage still need access to the same floor area.
Instead of surrounding the hitting zone with a permanent frame, the impact surface can be raised or retracted after play.
See
retractable golf simulator screens,
G-TRAK garage enclosures
and
HomeCourse retractable enclosures.
Net-Only Setup
A practice net removes the projector and impact-screen requirements entirely. That can be the most practical garage arrangement for golfers primarily interested in launch-monitor data and practice rather than playing projected virtual courses. Compare the available
nets and hitting mats.
Step 3: Choose the Launch Monitor Around the Garage
The launch monitor determines much of the room geometry, so choose it before finalizing the screen and hitting position.
Overhead Launch Monitors
An overhead launch monitor keeps hardware off the garage floor and can work especially well in a permanent simulator bay.
Before choosing one, confirm:
- required mounting height;
- hitting-zone dimensions;
- whether the garage door can operate without contacting the monitor;
- whether ceiling tracks or openers block the required position;
- electrical and data connections.
Portable Launch Monitors
Portable units can make more sense when the garage must return to normal use after practice.
Some sit next to the hitting area while others require space behind the ball. The exact arrangement depends on the sensing technology and model.
Compare
portable launch monitors
or browse the full
launch monitor category.
Step 4: Plan the Impact Screen and Ball Containment
The impact screen is not only a projector surface. It must repeatedly absorb real golf-ball impacts while keeping rebound manageable.
A garage build should account for:
- screen tension;
- space behind the screen;
- side protection;
- ceiling protection near the screen;
- frame padding;
- possible misses from every golfer who will use the bay.
A beautiful projected image does not compensate for inadequate ball containment. Safety and room protection should be designed first.
Step 5: Choose a Garage-Friendly Projector Layout
Projector planning in a garage is largely about avoiding three problems:
- the golfer casting a shadow on the screen;
- the projector entering the swing area;
- ambient light reducing image contrast.
A projector should be selected from the screen dimensions and throw distance available in your actual garage. Do not buy based only on brightness or resolution.
Use the
golf simulator projector
category once the screen position and image dimensions are known.
Step 6: Control Garage Lighting
Garages often have more uncontrolled daylight than dedicated indoor simulator rooms.
An open garage door can overwhelm a projected image. Windows, translucent door panels and bright overhead fixtures can also reduce perceived contrast.
A useful lighting plan separates the hitting area from the screen:
- keep unnecessary light off the projection surface;
- provide enough light around the golfer for safe movement;
- avoid fixtures that create glare on cameras or screens;
- use blackout treatment where daylight is a persistent problem.
Step 7: Fix the Concrete-Floor Problem
A bare garage slab is a poor long-term hitting surface.
Your setup needs a stable stance surface and a hitting area designed to absorb repeated club impact. The hitting mat should remain level and should not slide during a swing.
Additional turf or flooring can help:
- create a level stance area;
- protect the concrete;
- reduce hard surfaces around the hitting area;
- create a cleaner transition between the golfer and impact screen;
- improve the appearance of a permanent simulator room.
See our
golf hitting mats
for dedicated hitting surfaces.
Step 8: Plan for Heat, Cold and Humidity
A garage may technically be indoors while still experiencing much larger temperature swings than the rest of the house.
That affects both comfort and electronics.
Before making the simulator permanent, evaluate:
- garage insulation;
- winter heating;
- summer cooling or ventilation;
- condensation and humidity;
- the operating and storage requirements published for your electronics.
A simulator that is uncomfortable for half the year is unlikely to deliver the practice value you expected from building it.
Step 9: Protect the Garage Door, Walls and Ceiling
Design containment for bad shots, not only good ones.
A garage contains many surfaces that you do not want to hit with a golf ball:
- door panels;
- windows;
- garage-door tracks;
- opener mechanisms;
- unfinished drywall;
- storage shelves;
- vehicles.
Side curtains, ceiling protection, enclosure panels, padding and nets should be planned around the realistic miss pattern of every user.
Step 10: Plan Power, Network and Cable Routing
A full garage simulator may need power for:
- projector;
- computer;
- launch monitor;
- display or television;
- lighting;
- motorized retractable screen;
- heating or cooling equipment.
Avoid running temporary cables across walking and swinging areas. A permanent build should have a deliberate cable route and enough properly located electrical capacity for the installed equipment.
Simulator software may also require internet connectivity for downloads, updates, licensing or online play, so check Wi-Fi performance in the garage before the room is finished.
Garage Golf Simulator Equipment Checklist
| Component | Required? | Garage-specific consideration |
|---|---|---|
| Launch monitor | Yes | Placement and required ball-flight/hitting zone |
| Hitting mat | Yes | Stable surface over concrete |
| Impact screen | For projected simulation | Fixed vs retractable |
| Enclosure / side protection | Strongly recommended | Protect door, walls and surrounding equipment |
| Projector | For projected simulation | Throw geometry and ambient light |
| Computer / device | Depends on simulator | Safe location away from impact and temperature extremes |
| Turf / flooring | Optional | Comfort, leveling and room finish |
| Climate control | Garage-dependent | Seasonal comfort and electronics environment |
Three Practical Garage Simulator Builds
1. Simple Practice Garage
Use a launch monitor, hitting mat and practice net.
This is the simplest approach when shot data matters more than projected golf. It also minimizes permanent changes to the garage.
2. Retractable Multi-Use Garage
Use a retractable impact screen or enclosure, a launch monitor that can remain safely mounted or be stored quickly, and a hitting area that does not prevent the garage from returning to normal use.
This is often the strongest architecture when the same bay still needs to hold a vehicle or function as a workshop or gym.
3. Dedicated Garage Golf Studio
Use a permanent enclosure, permanently aligned projector, full hitting mat or turf area, fixed computer position and — where appropriate — an overhead launch monitor.
This gives the cleanest simulator experience when reclaiming the garage for another purpose is not important.
How Much Does a Garage Golf Simulator Cost?
There is no useful single garage-simulator price because a setup can range from a launch monitor hitting into a net to a fully finished simulator room.
The major cost variables are:
- launch monitor;
- screen or net;
- enclosure;
- projector;
- computer;
- hitting mat and flooring;
- software;
- electrical work;
- insulation or climate control;
- garage modifications.
Use our
home golf simulator setup cost guide
to build the budget after you know which garage configuration you need.
Common Garage Golf Simulator Mistakes
Tracks and openers can occupy the swing zone even when the nominal ceiling height looks sufficient.
Different monitor types impose different room-layout requirements.
A retractable system may solve the problem more cleanly.
A stable hitting and stance surface is part of the simulator, not an optional cosmetic upgrade.
Throw distance must match the actual image geometry.
A technically functional simulator is not useful if the garage is uncomfortable for much of the year.
Protection must also contain shanks, high shots and other misses.
Power and data cables should not cross the player’s stance or walking path.
Garage Golf Simulator Build Order
- Clear the intended hitting area.
- Take full practice swings.
- Measure usable height, width and depth.
- Map garage-door tracks, opener, lighting and storage.
- Decide fixed vs retractable.
- Choose the launch monitor.
- Establish the hitting position and screen position.
- Select the enclosure or net.
- Calculate projector throw geometry.
- Plan flooring, power, network and climate control.
- Install ball containment and padding.
- Test the complete system before finishing cosmetic details.
Choose your garage setup
Start With How the Garage Needs to Function
If the garage will become a permanent golf room, compare complete simulator and enclosure packages. If the garage still needs to park a vehicle or support another activity, start with retractable screens and garage-specific enclosure systems.
Frequently Asked Questions
Can you put a golf simulator in a garage?
Yes. A garage can work very well for a golf simulator if it provides enough safe swing clearance and enough room for the launch monitor, screen or net, and surrounding protection.
How high does a garage need to be for a golf simulator?
There is no universal ceiling-height requirement because golfer height, club length, swing shape and ceiling obstructions differ. Test full driver swings at the intended hitting position and compare the space with the requirements of your equipment.
Can I keep parking my car in a garage with a golf simulator?
Yes, but a retractable screen, retractable enclosure or removable practice-net setup is usually easier to integrate than a large permanent enclosure occupying the parking bay.
Do I need a projector for a garage golf simulator?
No. You can practice with a launch monitor and net while viewing shot data on a computer, tablet or separate display. A projector and impact screen are needed when you want the virtual course displayed directly in the hitting area.
Is a retractable golf simulator good for a garage?
It can be one of the most practical solutions when the garage serves multiple purposes because the screen or enclosure can be moved out of the way after play.
Can a garage golf simulator work without heating or air conditioning?
That depends on local climate, insulation and the operating requirements of the electronics. Evaluate both player comfort and the manufacturer’s recommended conditions for the launch monitor, projector and computer.
Should I use a fixed or retractable enclosure?
Use a fixed enclosure when the garage is becoming a dedicated simulator room. Consider a retractable system when the same space still needs to support parking, storage, a gym or a workshop.
What should I buy first for a garage golf simulator?
Measure the space first. Then choose the launch monitor because its placement requirements influence the hitting position, screen location and overall room geometry.
Bottom Line
A successful garage golf simulator is primarily a room-planning project.
Start with the swing and the garage hardware. Decide whether the room will remain multi-use. Then choose the launch monitor, screen or net, enclosure, projector and hitting surface around the usable space that actually remains.
If the garage must continue functioning as a garage, retractability is often more important than building the largest possible simulator. If the room is becoming a dedicated golf studio, a permanent enclosure and fixed equipment can provide a cleaner, more repeatable experience.

Lila Chambers is an avid golf enthusiast and author who specializes in writing about indoor golf simulators. With a passion for blending technology and sport, she explores how these innovative systems enhance the golfing experience, making the sport accessible year-round. Lila’s insightful articles provide valuable information for both casual players and dedicated golfers, helping them navigate the world of indoor golf with ease.
Discussion